This guide is for laboratory technicians who use the Lab Portal (account role: Lab Admin). Read Getting Started first.
1. How lab work flows through DoconDuty
- A test is ordered. Lab orders are created in the Admin Portal — by a Hospital Admin on the Lab Tests page (Order Lab Test), or with Refer to Lab from a prescription. Each order has a patient, an ordering doctor, one or more tests, a Priority (Routine, Urgent or STAT) and optional clinical notes.
- The lab processes it. You see the order in Test Orders and update its status as you work.
- The result is recorded. You upload the report (results, summary, interpretation and, if you have one, the PDF or image file).
- The report is available to the hospital in the Admin Portal, where it can be added to the patient's medical records.
Note: Doctors cannot order lab tests from the Doctor Portal at present, and the Lab Portal has no "new order" button. Orders come from the Admin Portal.
Note: DoconDuty does not track sample collection (barcodes, collection time, sample type) separately. Use your existing lab procedures for samples.
2. Log in and your menu
Use the Lab Portal card on the home page and select Login as Lab. The sidebar contains:
| Menu item | What it is for |
|---|---|
| Dashboard | Pending orders and critical results at a glance |
| Test Orders | All test orders and their status |
| Upload Reports | Record results and upload report files |
| All Reports | Search all reports |
| Critical Results | Reports marked critical or abnormal (see section 7) |
| Notifications | Lab notifications (see section 7) |
3. The lab dashboard
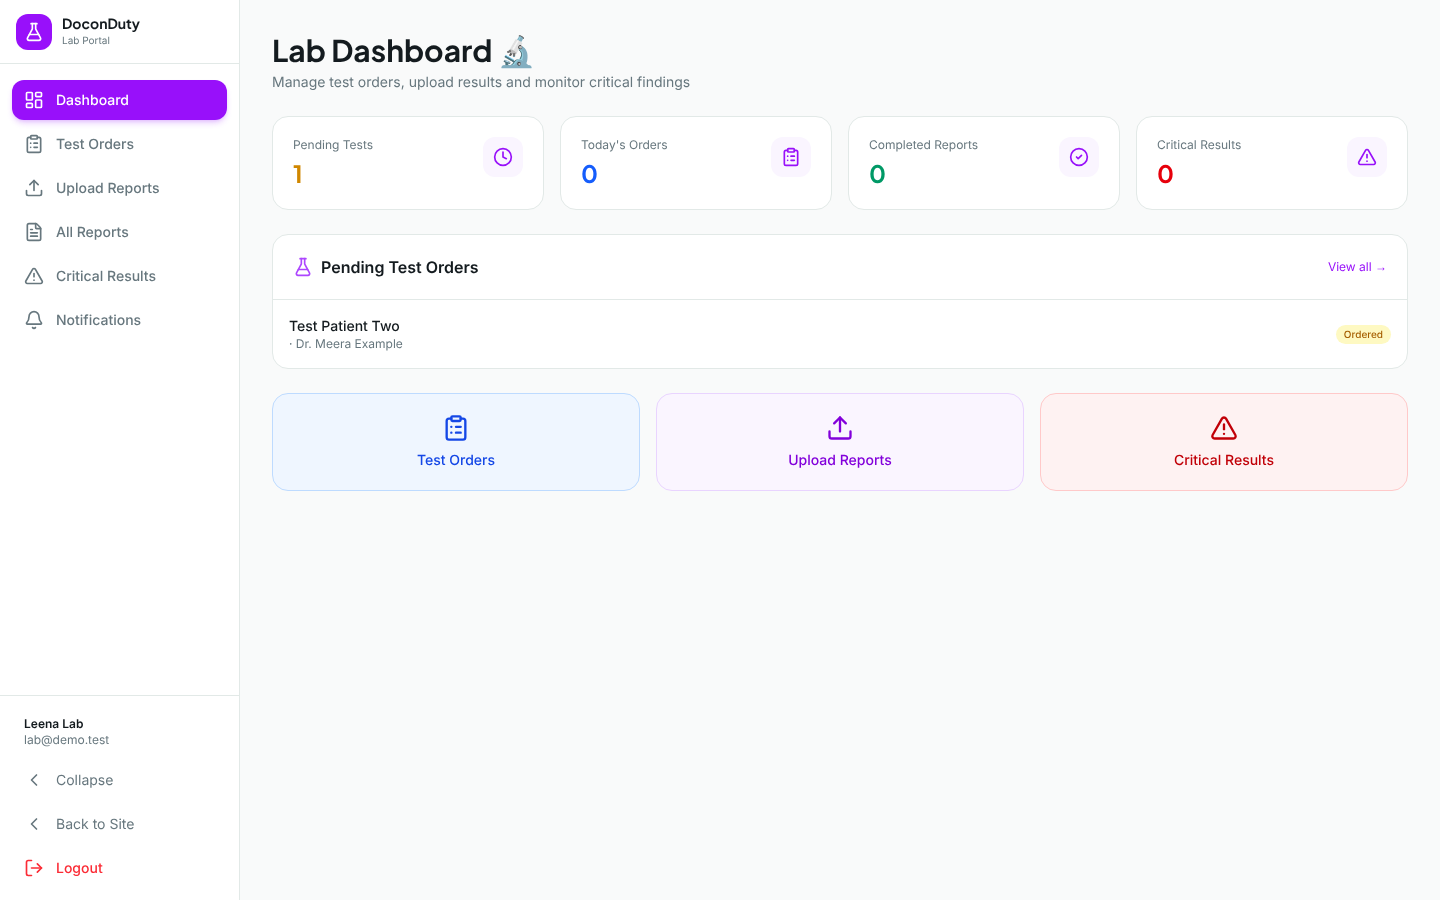
The Lab Dashboard shows counters, a Pending Test Orders list (orders with status Ordered) with View all →, and a red Critical Results — Immediate Attention Required box when applicable.
4. Work through test orders
- Select Test Orders.
- Search in Search patient or test... or filter by status.
- For each order, change the status with the menu in its row as work progresses:
| Status | Use it when |
|---|---|
| Ordered | The order has been received but work has not started. |
| In Progress | The sample is being processed. |
| Completed | The result has been reported. |
| Cancelled | The test will not be done. |
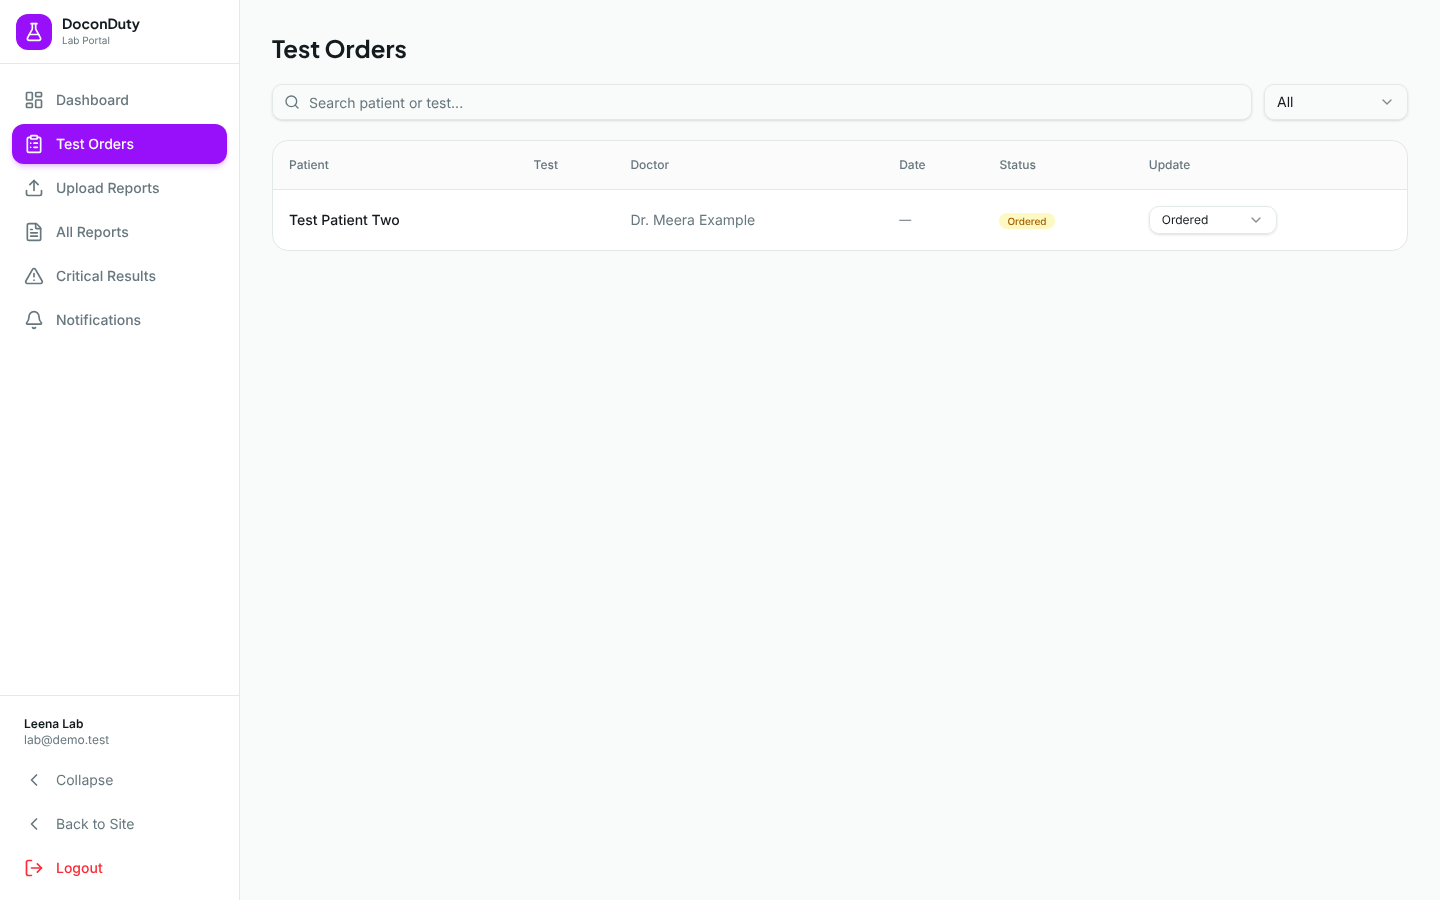
Note: Uploading a report in the Lab Portal does not change the order's status automatically. Set the order to Completed yourself after uploading the report.
5. Upload a report
Purpose: Record the results of a test so the hospital and doctor can see them.
Who can do this: Lab Admin (Hospital Admins can also record reports on the Lab Tests page).
Before you begin: Have the final, checked results ready. If you will attach a file, have the PDF or image saved on your computer.
Steps:
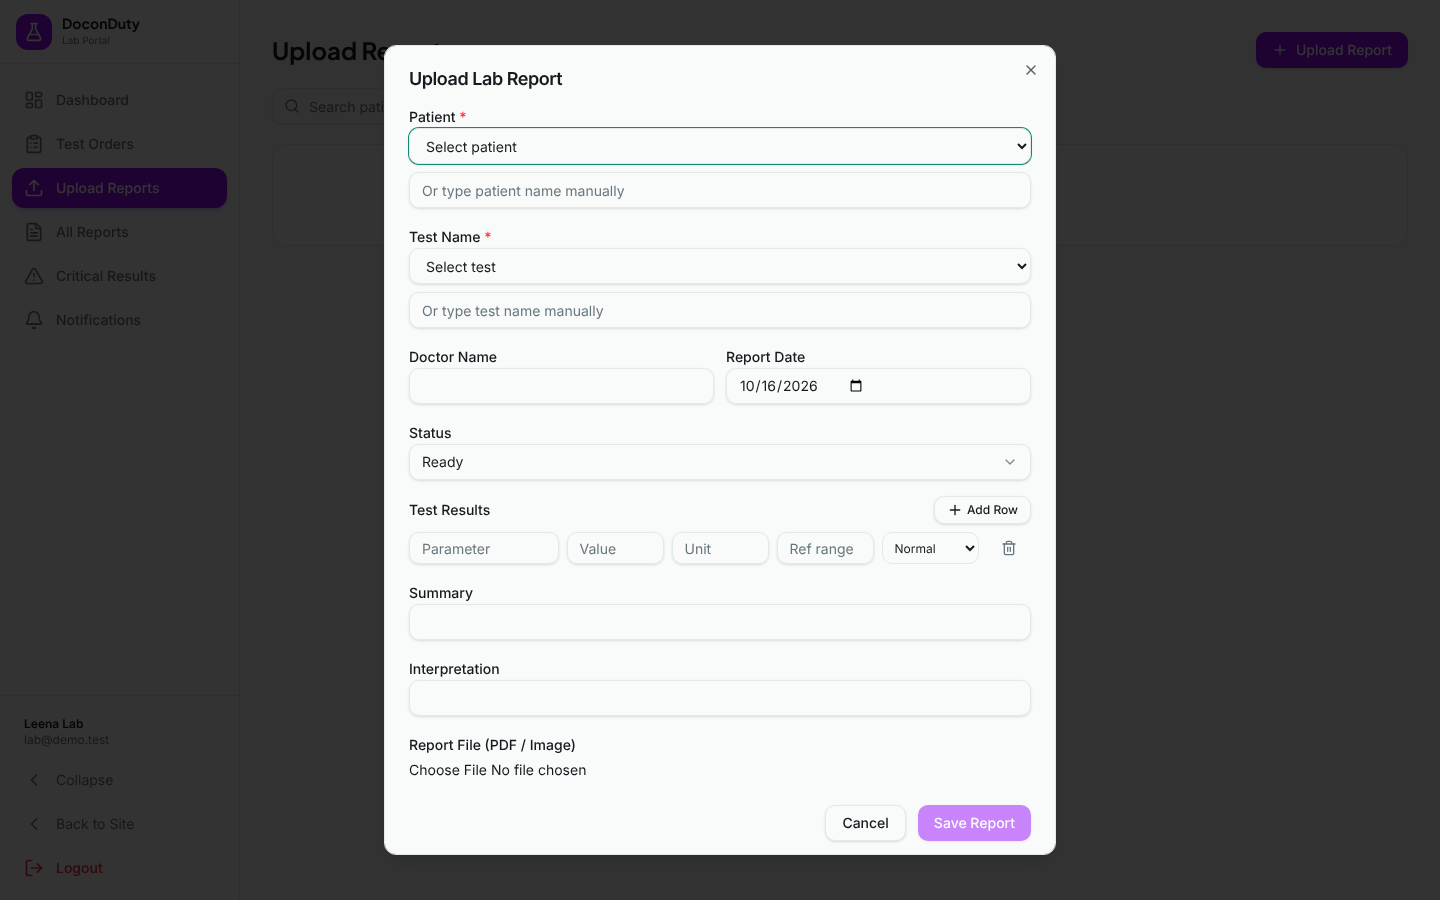
- Select Upload Reports, then Upload Report.
- Patient * — choose the patient from Select patient, or type the name in Or type patient name manually.
- Test Name * — choose from Select test (tests from existing orders), or type it in Or type test name manually.
- Fill in Doctor Name and check the Report Date.
- Choose the Status: Pending, Ready or Reviewed.
- Under Test Results, fill in a row for each result: Parameter, Value, Unit, Ref range, and the flag (Normal, High, Low or Critical). Select Add Row for more rows.
- Fill in Summary and Interpretation.
- Optionally attach the report under Report File (PDF / Image).
- Check the patient name, test name, every value and unit, and the flags.
- Select Save Report.
What happens next: The message Report uploaded successfully! appears and the report appears in the list.
Common problems:
| Problem | What to do |
|---|---|
| Patient name and test name are required | Fill in both. |
| The patient is not in the Select patient list | The list shows your hospital's registered patients (name, hospital ID and email). If the patient is missing, check the test order; you can type the full name exactly as registered in Or type patient name manually. |
| The file will not upload | Use a PDF or image file. If it still fails, save the report without the file and ask your Hospital Admin to attach it. |
Important: A typed patient name must match the registered patient exactly, otherwise the report may not appear with the right patient. Always copy the name from the test order. Never record results for one patient under another patient's name.
6. Find existing reports
Select All Reports (page title All Lab Reports). Search in Search patient, doctor or test... and filter by status. Where a file was uploaded, use the link in the File column to open it.
7. Critical results and notifications
Important — contact the doctor directly. DoconDuty does not page or alert a doctor when you record a critical value. When a result is critical, follow your laboratory's procedure and inform the ordering doctor in person or by phone immediately.
Critical Results lists every report that has at least one result row flagged Critical (shown in red) or High/Low (shown as Abnormal, in yellow). Reports with a Critical row also appear in the red box on the Lab Dashboard. The flag you choose for each row when uploading is what puts a report here, so set flags carefully.
Notifications lists your hospital's "Lab Report Ready" notifications. These are created when staff send that notification from the Admin Portal's Notifications page; uploading a report does not create one automatically, so this page may be empty.
8. What the Lab Portal does not do
Not available yet:
- Creating new test orders (done in the Admin Portal).
- Sample collection and tracking.
- Automatic status change of the order when a report is uploaded.
- Automatic alerts to doctors for critical results.
- Changing your own password (ask your Hospital Admin).
Related: Hospital Admin Guide — Laboratory tests · Troubleshooting